

If you haven't noticed already this is a very long video (37min) so make sure you’ve got some time to absorb it.
Good paint correction is an important albeit time-consuming step of a detail so there’ll be huge savings to be had if you can step up your paint correction game and continue to tune it for efficiency.
Even if you aren’t a professional detailer, you’ll make space by using efficient processes to bump the quality of your finish up in the same time.
Step 1: Washing;
As usual we start with the wash, it’s always very important to wash the car thoroughly before any detailing processes, attempting to carry out serious paint correction without first cleaning the debris out of all the areas that can be shaken loose during correction is incredibly amateurish mistake that’s still quite common.
We try to avoid using brushes on paintwork as much as possible but if you're stuck using brushes to get around badges and other details, now's the time to do that because you're going to correct the paint anyway so if you just happen with those brushes to marr the paint a little better to do it now before the paint correction!
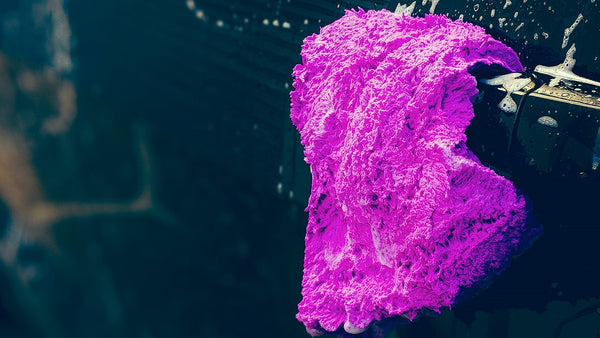 The 'Curvy Lady' Wash Mitt in action
If you prefer and can remove badges etc. it's always best to polish behind them and replace them. Our point here is to just make sure that the car is VERY clean.
Step 2: Decontamination;
Next step is to decontaminate it’s so important and the foundation of good paint correction, if you don't do it you're going to set yourself up for much longer correction times.
You can fill your pad with unnecessary debris and you'll fight friction as a result you may create more swirling as you move those particles around, you can push contaminants down and heat them to fuse them to the surface and hologramming is a greater issues too as you’re pad wont be as smooth and stable as it should.
Starting out with a much smoother surface that's clean and free of that contamination gives you significantly better paint correction processes, so give you that self a really good base, don't skip or cheat on this basic but fundamental process.
You MAY use a clay bar but you’d be better off using an Eraser.
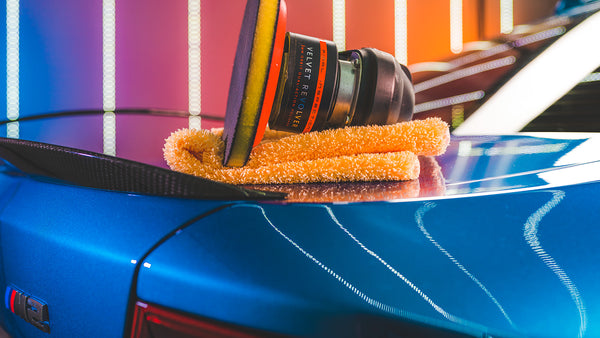 'The Eraser' in action mounted to a Velvet Revolver
Both of these tools remove contaminants above the surface unfortunately the clay bar pulls these contaminants up into itself whereas the Eraser doesn't hold the contaminants instead it drops the contaminants back down into the slurry of lube that you wipe away leaving a fresh pad every time so when you decontaminate the next panel that eraser is clean and it doesn't have those contaminants in it, you're not reintroducing them to the surface and you’re avoiding the damage a clay bar does because it holds onto those contaminants.
Another benefit of the Eraser is if you happen to drop it on the ground you can pick it up wash it out :)
Step 3 : Diagnostics;
Diagnostics are useful if you have the time in your budget to do it, because it does take a lot of time, usually anywhere between two to four hours per vehicle.
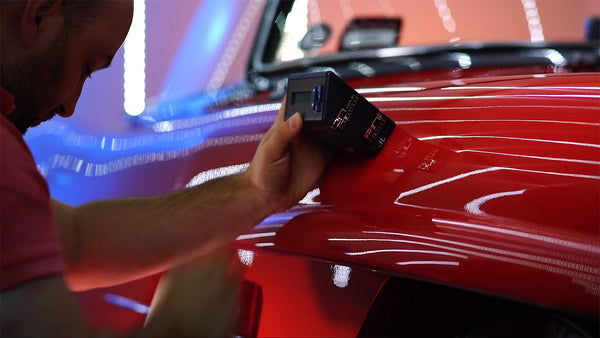
Damian reads gloss during paint correction of a '55 300SL
You need to have either an SSM (Surface Smoothness Mapping) machine (which most detailers won't and we don’t blame you or an ultrasound paint thickness tester. It’s good to have a gloss meter, although this one's far less important.
PTT (Paint Thickness Tester)
The benefit of paint thickness testing is that it gives you a much better understanding of how much paint you've got to work with so you don't make the horribly gut wrenching mistake of taking some paint off a customer's car. We’ve done this twice in nearly 25 years and whilst both times it's not been our fault, it's just been horrible to contact a customer that bad news.
The issue with capturing thickness readings is if you have to collect at least 250 to 1000 readings per panel. If you take a reading here and there you may be missing a spot that's very low that you're going to ‘strike through’ and you still have to re-paint the whole panel to rectify.
So you do have to take a lot of readings and four hours isn’t at all an exaggeration, this time must be incorporated into the budget and to be honest we only do this to ~25% of jobs that we determine will be risky or very expensive if there’s an issue.
It’s just simply unviable for every single job. For example, if you have a classic car with original paint and that car will be worth significantly less than it does if you have to paint a panel or two, it is a candidate for a thorough diagnostic session.
As a professional you will have/gain the experience to read the risk. If a customer can't afford it or you can't find a way to build it in either take the risk (NOT RECOMMENDED) or don't take on the job at all.
If you get a low reading you want to flag that for obvious reasons, you’ll want to make sure that you're doing less work in that area. We tend to just avoid it completely by masking it off and once correction is complete on the panel we remove the mask and lightly blend in being ultra careful.
Also, if you’ve got a very high reading, something's wrong. Make sure your machine’s calibrated, make sure you're using a quality device and make sure it hasn’t been dropped and it’s is calibrated correctly as it’s a precision instrument.
Gloss testing can be useful it's mostly useful just so you know that you actually have statistically increased gloss in that area. A gloss meter sends a beam in (at twenty degrees for high gloss surfaces) and attempts to catch the reflection, which, if it returns at twenty degrees is a perfect 100gu (gloss units), that's perfect gloss and realistically unachievable, most of our fresh details are 95-96gu.
Step 4 : Paintwork Correction;
So you've got your different level of scratches at their different depths.
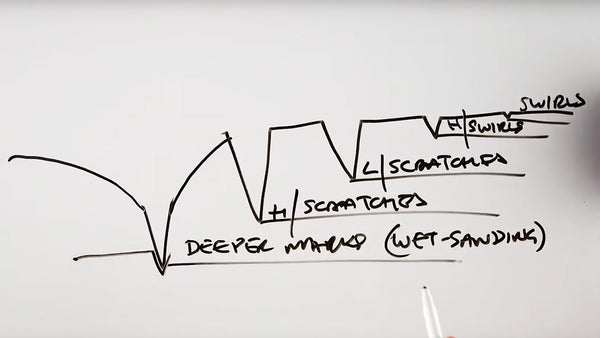
From right to left, light to heavy, we classify these imperfection depths as swirls, heavy swirls, light scratches, heavy scratches and what we call ‘deeper marks’ that require very aggressive methods to remove such as wet sanding or are not removable but can be ‘rounded’ in an attempt to disguise the edge making them less noticeable as a result.
It takes us about eight to twelve hours to remove swirls from a car and achieve a 95-96gu finish
It requires approximately 15 hours to remove heavy swirling and/or light scratches, about 18 hours to remove light scratches and 30 to 40 hours to remove heavy scratches.
This is the paint correction component of our ‘stages’ of detailing. The discrepancy of timing is related to surface area (car size) and paint type.
Polish Types / Choosing a polish
For polish choice you really have two types, chemical cleaners and abrasive polishes. There are also hybrid of both types.
Some have glazes which ‘fill’, some have other additives to enhance, generally glazes and other additives.
These products usually achieve a finish which is quick to create but short-lived, so the finish is temporary. Final Inspection only uses the abrasive polishing type of polishes for permanent result and if we use glazes, we use them after complete correction to enhance the surface further.
Chemical polishes are completely useless in our opinion, they're not correcting any imperfections, they’re simply cleaning the surface to give the appearance of a polished finish.
Dark Matter is a hybrid which has some protection in it, so it’s a paint protection, it has glazes and it has a small amount of light abrasives in it for some light-duty permanent correction if applied by machine. Colour charged glazes in Dark Matter increase depth of colour and gloss beyond what an abrasive polish can achieve if applied to a corrected surface be it paint, acrylic, polycarbonate or chrome.
Abrasive
There is (generally) CAP technology and static diminishing abrasives. Polishes are more complex than this but you basically have 2 components to an abrasive polish, lubrication and abrasives.

Some formulae will have more abrasives than lube, many manufacturers include significantly more lubrication than abrasives and usually this is because abrasives are the more expensive component. These polishes are often marketed as having ‘long working times’ with the implication that long working times is a useful characteristic.
Longer working times for real professional detailers equate to more cost as well as longer turnaround times.
For example, Final Inspection’s CAP range has a high concentration of (aluminium oxide) abrasives, this requires a very high quality lubrication, the less Lube you have, the higher quality has to be it has to be able to cope with the high friction of a highly concentrated abrasive mixuture.
Diminishing polishes usually have single sized abrasive particles that correct as they cut at once specific level of aggressiveness, then as the particles ‘round off’ and become spent after a certain amount of working time they have achieve all the repair work they will offer.
To better understand the way polishes work, we often use the sandpaper analogy. Polishes are very similar to sandpaper in the sense that polish has abrasives which re-level material, the difference being that the polish abrasives, which are much finer, are suspended in liquid instead of adhered to a sheet. Instead of rubbing that abrasive faced sheet along the surface, you're applying a liquid of suspended abrasives to a pad and agitating it.

Diminishing abrasive polishes are also similar to sandpaper in the sense they have a grit level, for example, p6000 equivalent or something like that and they will cut and finish at that level and only that level now your cap polishes (Clustered Abrasives Polish) will have abrasives that are clustered in groups they kind of huddle together these act as one big abrasive which can be anywhere between two to five times the size of your diminishing abrasives they then break down into smaller particles similar in size to the diminishing particles so they don't behave like a sandpaper, they may start cutting at, for example, a p2000 grit level and finish up at a P4000.
Being able to cut at one level and refine down to another is hugely beneficial as it makes for an efficient process. The savings allow for extra corrective work, as a result the detailer is achieving more for any given time.
Soft vs Hard Abrasive Particles
Some polishes have hard abrasives which can be an issue, especially on softer paintwork. When you have some dusting and you have some abrasives that have been ejected from the pad and sitting on top of the surface removing them can cause the drag that is unavoidable to create marring. Soft abrasives avoid this issue.
Chemical Softening
Cheap polishes often contain chemicals to soften a surface. The trick uses softening to help the abrasives remove the film build (paint or another material) easier. The correction is temporary with some to most of the imperfections returning and, if the polish is particularly cheap, more marring from the abrasive particles which are also usually hard and not uniform in size.
This issues manifests in a few ways, the most common is the suck back occurs whilst the detailer has the vehicle and he’s required to re-correct the surface effectively doubling his labour costs. Sometimes the suck back occurs when the customer has the vehicle and suffers the effects of imperfections returning.
Pads and Backing Plate type and size
Each pad has its own characteristics and offers its own level of cut and finish. We've listed these three from the heaviest cutting to the finest but you don't necessarily choose them for that one characteristic, there's a bunch of characteristics they have and you'd make that choice based on the application.
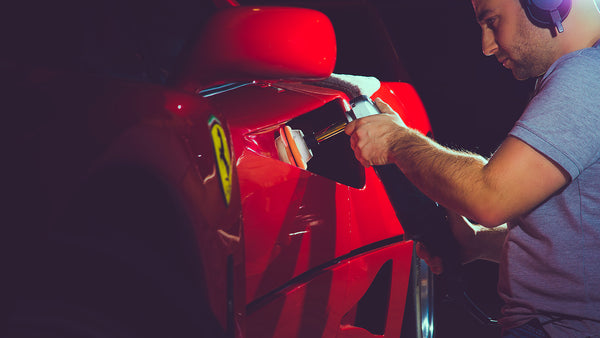
Damian attacks the Ferrari F40 during a 'concours' detail
There are pros and cons to each;
Wool
Old wool technology meant the fibres had microscopic hooks on them and just recently Australian wool has come through with a technology to ‘de-burr’ the hooks from the fibres resulting in smooth strands which has transformed the fibre from being completely useless for detailing. Wool Benefits include;
- Generally very fast cutting with fast working times and low temps considering the speed although they tend not to be considered cool, some types are cooler than others depending on the compilation of the pile and general structure.
- Cleanup is usually very quick and efficient, they wash clean without issue and usually with very little to no chemical and dry quickly for useful turnaround.
Wool downsides include;
- Wool pads are usually low gloss and generally leave some minor imperfections such as hologramming although this isn’t a huge issue in any multi-stage correction process and is expected and a fair price to pay for the very effective and efficient cutting ability.
- They can be dirty as they tend to drop fibres in use, especially if the pad edge is disrupted during correction more than NanoFibre and foam (if you look after your foam and clean it regularly)
- Allergic reactions to this natural fibre is an issue for a small number of operators.
Foam
- Can yield high cutting power which is also very uniform with reliable finishing.
- Foam doesn't cut as fast as wool nor does it finish as well as NanoFibre.
- Foam insulates well (which isn't a good thing), the heat can and often does result in adhesive layers that fail, burnt paintwork and backing plate adhesive layers that fail.
Companies have attempted to get around the heat issue by making a waffled face design or cutting patterns in the face of the foam pads in a mostly unsuccessful attempt to reduce the heat build. Any reduction in friction as a result of the designs does reduce friction and that does reduce heat, but it also reduces cutting power and increases cutting times, the pad essentially behaves like a smaller pad, the face is difficult to impossible to spur and cost is increased through the increased manufacturing processes.
Most waffle type designs don’t offer any usefulness as the peaks are squashed down under as little down force as 5kg of pressure (common and easily achievable by most operators), this makes hte pad essentially flat. Designs in the face cause polish to sling so they are generally dirtier options.
To get around this issue we tended to use a flat pad in a smaller size and/or reduce buffing times, the smaller pad mitigated the frictions issues. Some detailers used the higher lubricating polishes mentioned above, which result in long working times and sometimes increased sling.
Nanofibre
- Finishes up very well, very high glossing.
- Clean cutting (once new pads are spurred for manufacturing lint).
- One-step master.
- Generally inexpensive.
- Low heat build.
- Low cut (if producing high gloss) – no free lunch :(
OPR (Orange Peel Reduction) Pads
OPR pads reduce the amount of peel gradually, doing what sandpaper does with a very forgiving and adjustable nature. Something sandpaper cannot. If your goal is to reduce and blend texture to match adjoining panels, an OPR pad is the correct tool, not sandpaper.
Machine Choice
Rotary is still the choice of many very experienced professionals for;
- Ability to delivery feedback to the operator
- Superior accessory options, spinning pads as small as 25mm (1”) and as large as 200mm (8”) safely and easily.
- Speed of correction
- Ability to carry out detailed correction around obstacles
- Torque, rotaries are almost always the most powerful machines
- Compact, lightweight packages
- Simplistic and thus robust and reliable design
- Best finishing characteristics (provided the operator skill is high)
- Most economical long-term professional tool.
- Less fatiguing in general (versus a long throw random orbit)
- A rotary teaches you, sometimes in an unforgiving way, how to become a good paint correction specialist, unfortunately requiring high skill levels from a long learning curve.
- Requires the most attention so can be slightly more fatiguing for some use cases.
Long Throw RO (Random Orbitals) - 18 to 25mm orbits
- Fast cutting of large, flat areas, spinning large pads of between 135 (5”) to 150mm (6”)
- Significantly more risky than ‘low throw’ orbitals.
- Unable to correct detailed areas, not suitable for ‘cutting in’.
Short Throw RO (Random Orbitals) - 8 to 12mm orbits
- Good cutting and finishing balance for no to low skilled operators.
- Economical machine option with potentially longest life span of random orbit options.
- Ability to do semi-detailed work (8mm only)
- Longer pad life than larger throw machines
- More compact and usually lighter than longer throw machines
- Optional pad size down to 75mm
- Longer correction times than longer throw machines
Drill
Many detailed types of polishing with balls or cones to areas such as exhausts and engine bay components.
Step 5; Paint Protection
Paint protection isn’t really correction, so we’ll keep this section brief, however, it is important to seal ‘naked’ freshly corrected paintwork to avoid contamination and for washing that requires less mechanical force to remove debris. Paint protection greatly reduces the unnecessary undoing of your correction!
There are basically two types; Wax (natural) and Sealant (synthetic wax) + hybrid offerings. Carnauba waxes are natural and old technology. They offer inferior protection, longevity and performance to similar synthetic options.
Synthetic sealants such as Full Metal Jacket Paint Protection and Spray Wax are easier to use, significantly cheaper (than natural or hybrid waxes) when you consider the longevity and offer maximum protection.
Hybrids are a compromise between the two, our sole offering in this category, Dark Matter was mentioned in the polish section of this article. It offers good, but compromised performance and longevity with a priority on cosmetic appeal. It is designed for maximum gloss and depth of colour to enhance and protect show cars with little road use and little to no weathering.
Thank you very much and congratulations on making it through the article, may your cars be shiny and getting them there enjoyable :)
Comments
1 comment
Peter HUXLEY
Just The Tip Esp 03 is an outstanding information presentation regarding paint protection methodology for both the professional and weekend car enthusiast like myself. The explaination of the process is better understood and much appreciated.
Peter Huxley
Newcastle, NSW